How to share a printer on Windows
A brand new printer can encourage inventive initiatives and is an effective way to share moments with family and friends. You too can share the printer itself. It would not even have to be a wi-fi printer since Home windows can present a Wi-Fi connection to a USB-only or ethernet-only printer.
With just a few useful suggestions and screenshots exhibiting find out how to arrange printer sharing, you possibly can print from any laptop in your Wi-Fi community, together with Home windows and Mac machines.
Arrange the first PC
Step one in community printer sharing is establishing the first Home windows PC to permit this connection. You may anticipate these choices in printer settings, however Microsoft buried Superior sharing settings a number of layers deep and in one other part.
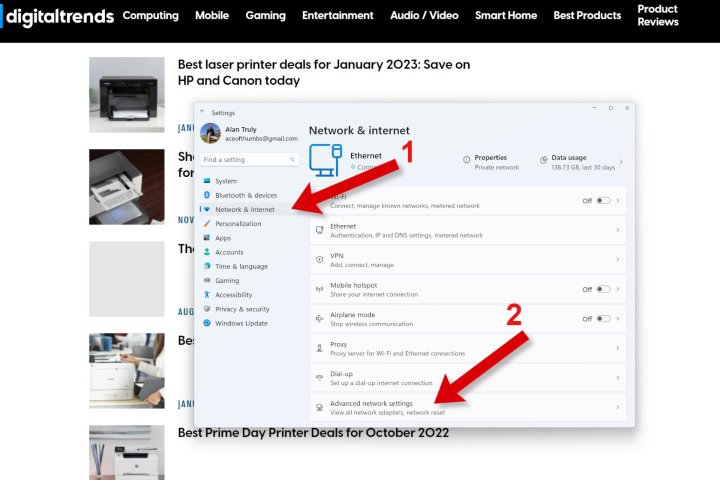
Step 1: Hit Home windows-I to open the Settings app, choose Community & web within the left sidebar, then Superior community settings on the backside.
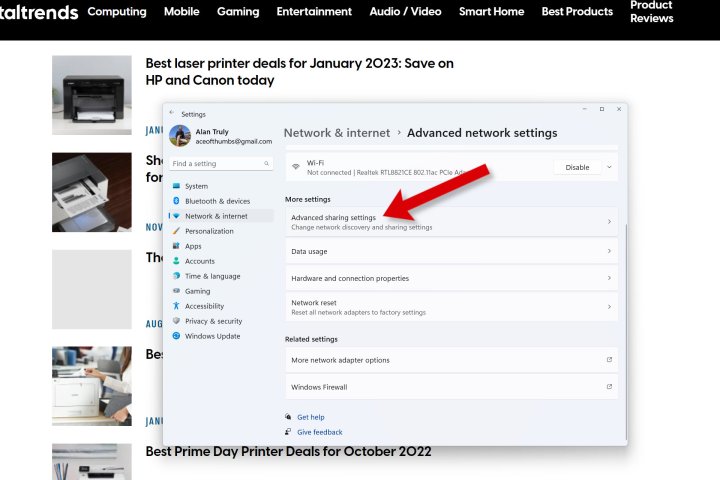
Step 2: In Superior community settings, select Superior sharing settings, drilling down one other layer.
Step 3: Lastly, you may see the toggle swap underneath Non-public networks for File and printer sharing. In the event you’re fascinated by studying extra about file sharing, we have now a information dedicated to transferring recordsdata PC to PC.

Step 4: Within the left sidebar, select Bluetooth & gadgets, then choose Printers & Scanners on the best.
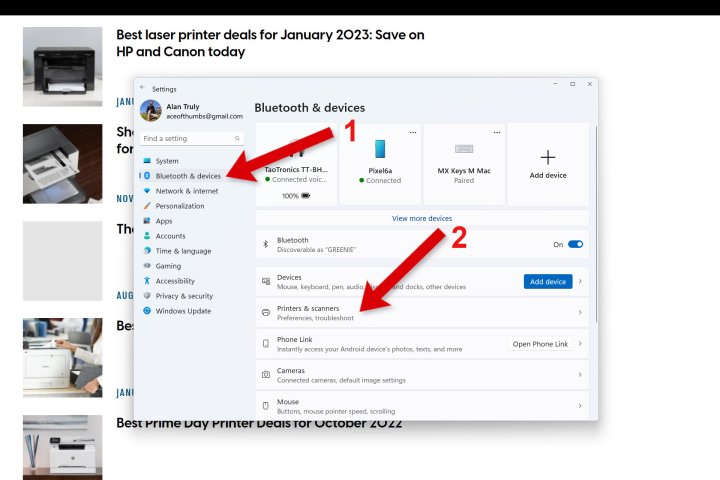
Step 5: Choose the printer you’d wish to share, then select Printer properties to open a brand new window with extra choices.
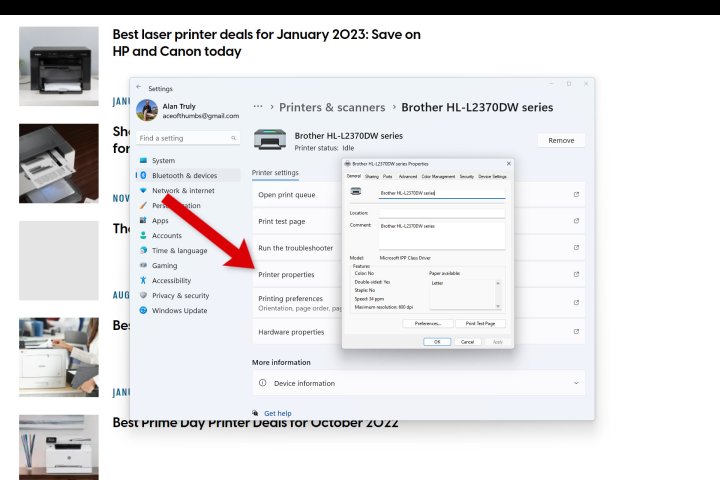
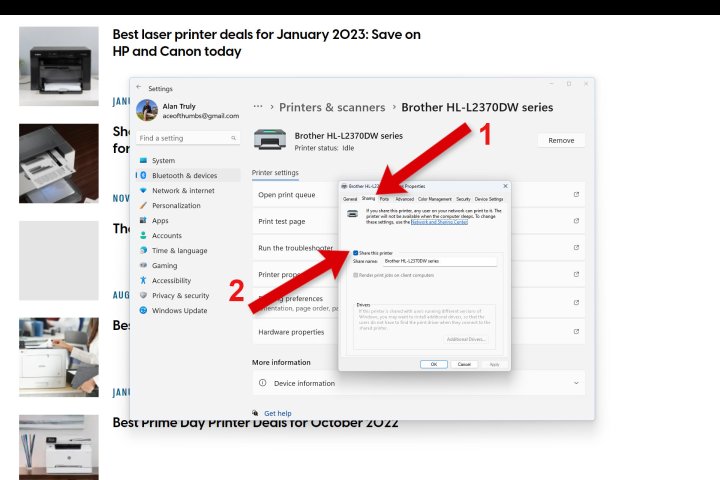
Step 6: Within the properties window, choose the Sharing tab, verify the field labeled Share this printer, then select OK to proceed.
Swap this on to permit different computer systems in your native Wi-Fi community to see and hook up with this Home windows PC to entry public folders and printers. If it would not work, see our troubleshooting information to unravel Wi-Fi issues.
How to connect with a shared printer
As soon as you’ve got bought the first laptop setup, connecting one other Home windows PC to that shared community printer is comparatively simple. It’s a must to have Non-public networks sharing enabled on the secondary PC as properly. See the steps above to set that up. Every little thing else occurs within the File Explorer.
Step 1: In File Explorer, scroll down within the left sidebar and select Community. It’d take a second for Home windows to attach and present the first laptop. If you see the identify of the pc that is linked to the printer, double-click to open it.
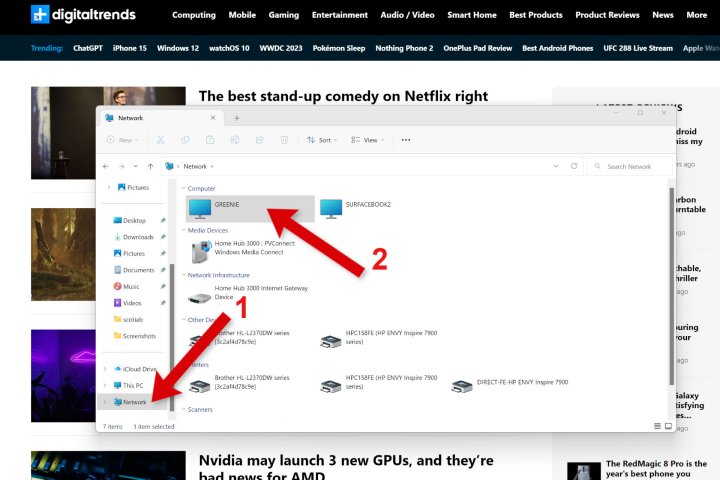
Step 2: You will see shared printers and shared folders. Proper-click the printer and select Join from the pop-up menu.
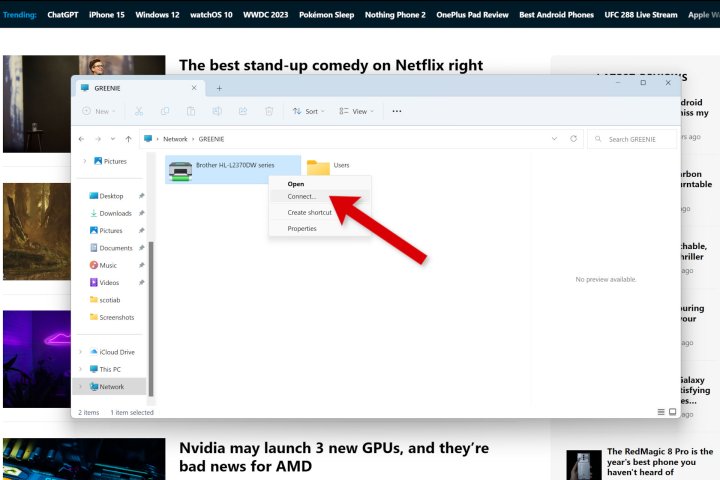
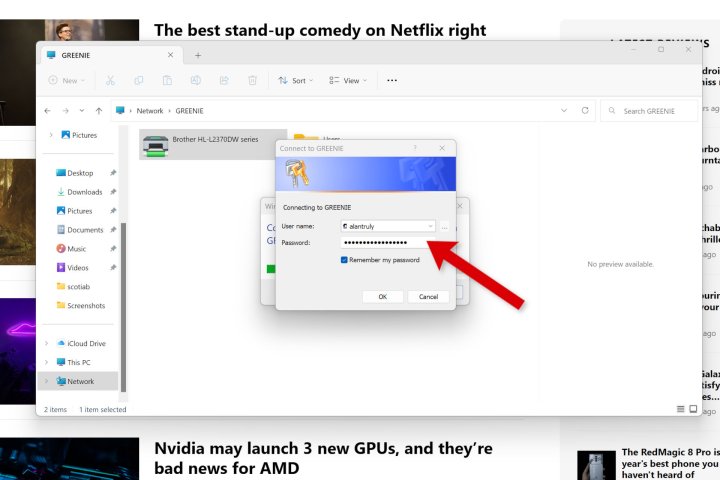
Step 3: You may be requested to enter a username and password that has entry to the first Home windows laptop relying on how the community is configured.
Afterward, the shared printer shall be accessible within the print choices window, like another printer.
Join a Mac to a Home windows shared printer
A Mac laptop or MacBook may entry a shared printer linked to a Home windows PC. This works by means of a system Apple calls Bonjour.
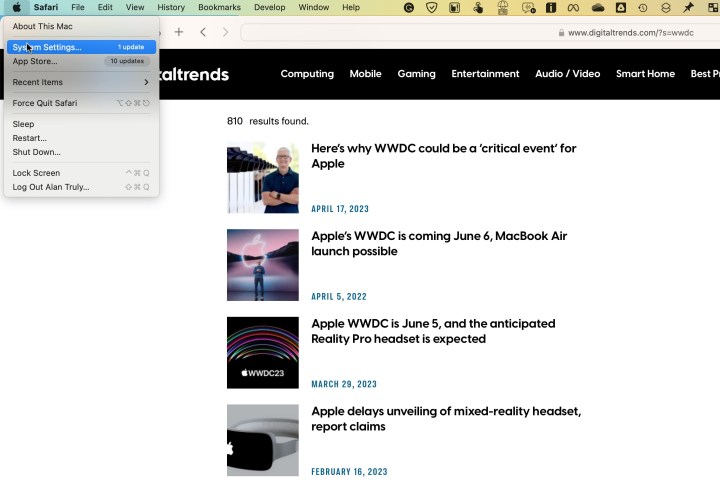
Step 1: Open the Apple menu within the high proper of the display and select System Settings.
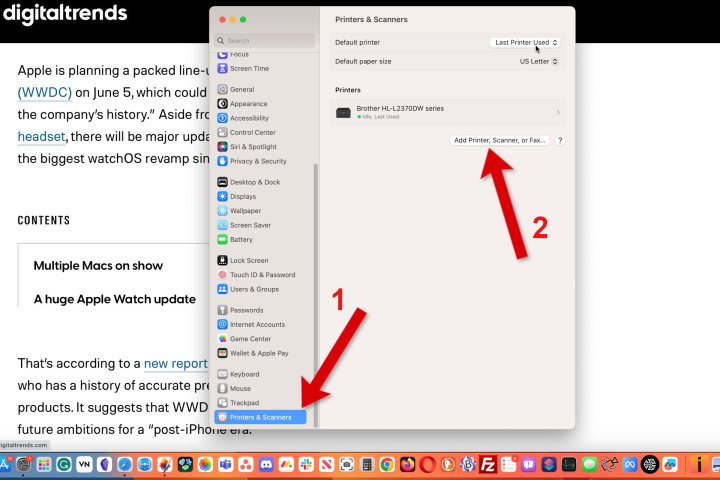
Step 2: Scroll down the left sidebar of System Settings and choose Printers & Scanners. Select Add Printer, Scanner, or Fax to get began.
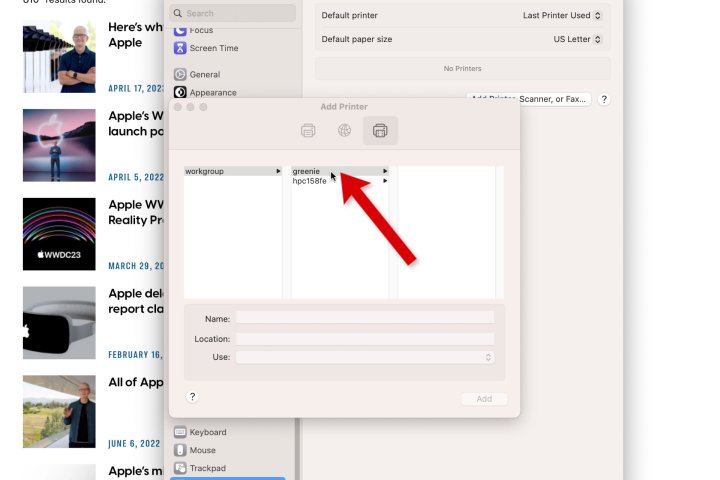
Step 3: An inventory of present printers shall be proven within the first tab. Choose the third tab to connect with a Home windows PC and use its printers.
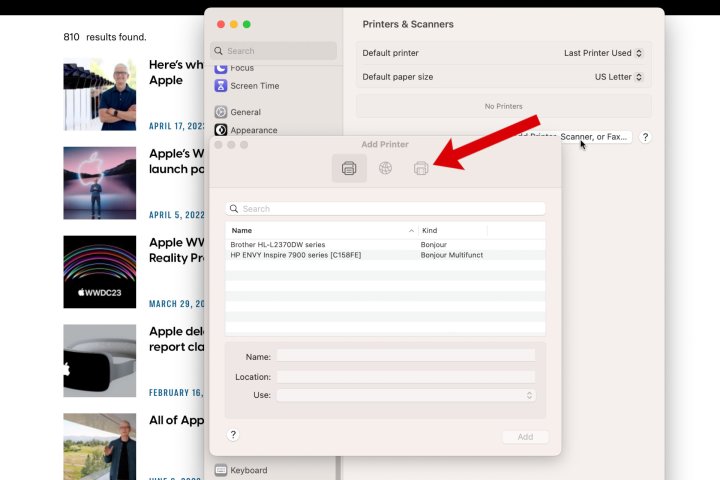
Step 4: Decide the Home windows PC that you just need to hook up with. You may want to pick out Workgroup first. On this instance, my Home windows laptop is known as greenie.
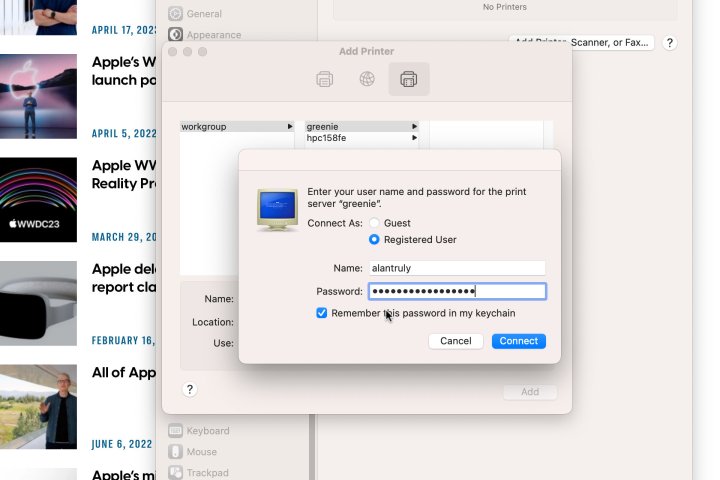
Step 5: If prompted to log in, enter a username and password for an account that has entry to the Home windows laptop.
Step 6: An inventory of shared printers shall be proven, so you possibly can choose the one you need. In case your Mac would not have already got a suitable driver, decide Choose Software program from the Select a Driver menu.
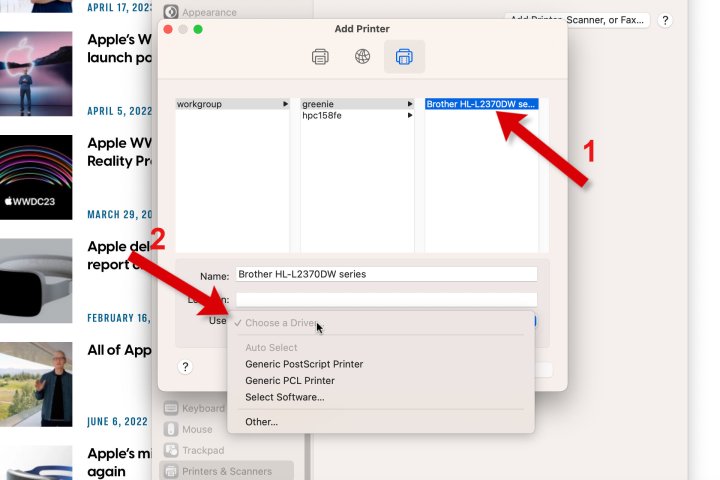
Step 7: Search or scroll down the checklist to seek out and select the most effective match. On this case, Apple did not present a really perfect match, however the driver for the same mannequin ought to work for printing. In the event you want a precise match, you possibly can set up the driving force from the producer’s web site.

If the shared printer is the most effective, the quickest, or essentially the most cost-effective, you may need to make it the default printer on Home windows and Mac.
Most of the greatest new printers have wi-fi capabilities, making it simple to share with any laptop. There are some sturdy, older fashions and low-cost printers that do an incredible job, however they might lack wi-fi printing. In that case, you possibly can join by way of USB or Ethernet to your PC, then share to Home windows and Mac computer systems over your native Wi-Fi community.
Editors’ Suggestions